
Tools
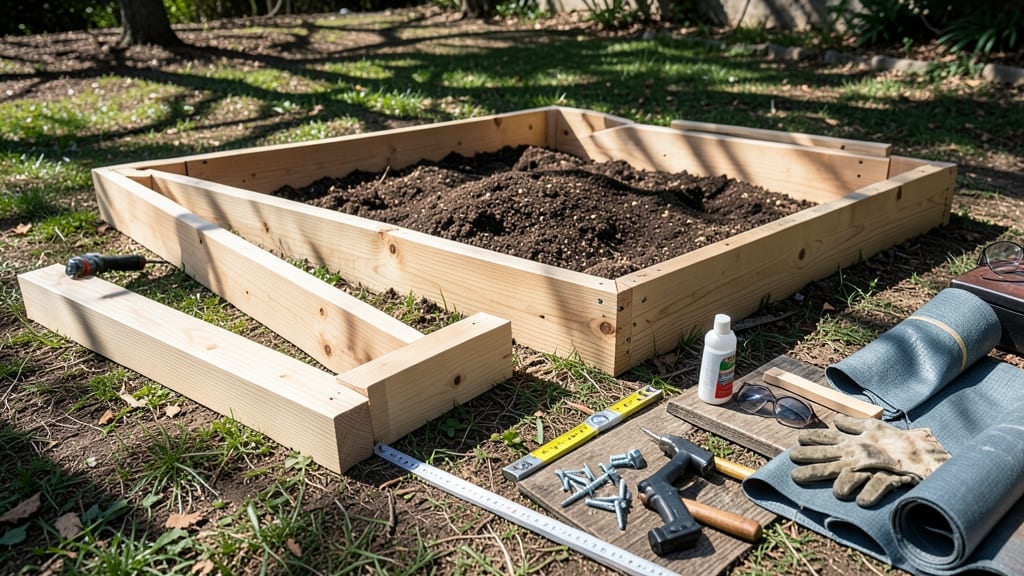
Planning 2x4 raised garden bed plans gives you a customizable, low-maintenance way to grow more in less space—without the backbreaking work of tilling.
Picture this: a sturdy, weatherproof bed that lasts for years, where your 🌱 Raised Garden Bed Plants (General) thrive in rich, weed-free soil while keeping pests at bay.
Whether you’re a beginner or a seasoned gardener, this project is simpler than you think—and I’ll show you exactly how to build one that fits your space and budget.
You’ll get a free cut list with exact measurements, step-by-step assembly tips, and pro tricks to avoid common mistakes (like warping or weak corners). No guesswork, just a durable frame that’s ready for planting by spring.
By the end, you’ll know how to customize your bed for any size, choose the best wood for longevity, and even add drainage or seating—all while saving money compared to pre-built kits.
Free 2x4 raised garden bed cut list: dimensions and material breakdown
A 4x8-foot 2x4 raised garden bed is one of the most popular sizes for home gardeners because it fits perfectly in most backyards while maximizing growing space. This cut list ensures you have the exact lumber quantities and precise measurements needed for a sturdy, long-lasting frame.
Whether you choose cedar for durability, pine for affordability, or composite for low maintenance, this guide covers it all.
Below, you’ll find the material breakdown for a standard 4x8-foot bed—plus tips for adjusting sizes or saving money. I’ll also include hardware specifications and a downloadable template to make your project seamless. No more guessing measurements or wasting wood!
| Cut List Item | Quantity | Length (Feet) | Wood Type | Notes |
|---|---|---|---|---|
| Corner Posts (Uprights) | 4 | 2 ft (height) | Cedar/Pine/Composite | Use 4x4 posts for extra stability |
| Long Side Frames (8 ft) | 2 | 7 ft 10 in (accounting for corners) | 2x4 Pressure-Treated | Notch ends for corner joints |
| Short Side Frames (4 ft) | 2 | 3 ft 10 in (accounting for corners) | 2x4 Pressure-Treated | Match notch depth to long sides |
| Horizontal Supports (Mid-Height) | 4 | 3 ft 10 in (short sides) or 7 ft 10 in (long sides) | 2x4 Pressure-Treated | Adds structural reinforcement |
| Corner Brackets (Alternative) | 4 | N/A | Galvanized Steel | Easier than notching wood |
| Deck Screws | 100+ | N/A | 3-inch Exterior Grade | Stainless steel for rust resistance |
| Hardware Cloth | 1 Roll | 4x8 ft | 1/4-inch Mesh | Prevents rodent burrowing |
For a 4x8-foot bed, you’ll need 12 pieces of 2x4 lumber (8 for the frame, 4 for supports) plus 4 corner posts if using 4x4s. If you’re building a custom size, adjust the lengths proportionally—just subtract 1.5 inches per corner from each side to account for the wood’s thickness.
For example, a 3x6-foot bed would require shorter lengths like 2 ft 10 in for the long sides and 2 ft 10 in for the short sides.
When choosing wood, cedar is the gold standard for durability and natural rot resistance, but it’s pricier. Pine is budget-friendly but requires sealing with a non-toxic wood preservative. For the longest lifespan with minimal upkeep, composite lumber is a great investment—it won’t warp or splinter like wood.
Just be prepared to pay 2-3x the cost of pine.
Pro tip: Buy lumber in 8-foot lengths to minimize waste. If you’re using corner brackets instead of notching, skip the extra cutting time and opt for galvanized steel brackets (about $2–$4 each). These add a polished look and make assembly a breeze, even for beginners.
Don’t forget hardware cloth! Staple a 1/4-inch mesh to the bottom of your bed to keep gophers and moles out. This is a non-negotiable step if you live in an area with burrowing pests.
For extra protection, add a second layer of hardware cloth on the sides if your bed is taller than 12 inches.
Once you’ve cut all your pieces, pre-drill screw holes to prevent wood splitting. Use a 3-inch exterior-grade deck screw for the frame and 2.5-inch screws for the supports.
If you’re using notched joints, make sure the cuts are clean and precise—a slight misalignment can weaken the entire structure. For a <
Step-by-step assembly guide for a durable 2x4 raised garden bed
A 2x4 raised garden bed is a fantastic DIY project that elevates your gardening game. Whether you're growing vegetables, herbs, or flowers, the key to success lies in a sturdy frame and proper assembly.
I’ll walk you through the process, from securing corners to layering soil, so your bed lasts for years and your plants thrive. Avoid common mistakes like skipping pest protection or uneven joints—these can shorten your bed’s lifespan.
Before you start, gather your 2x4 lumber, corner brackets (or saw for notched joints), and hardware cloth. A 4x8-foot bed is ideal for beginners, but adjust dimensions as needed. For extra durability, use cedar or pressure-treated lumber, and always pre-drill holes to prevent splitting. Let’s get building!
🛠️ Step-by-Step Assembly Guide
- Step 1: Build the Frame
Cut 8 pieces of 2x4 lumber to your desired length (e.g., 4x8 feet). Assemble the frame by attaching the longer sides first using 3-inch deck screws or galvanized nails. Pre-drill holes to avoid wood splitting. - Step 2: Secure the Corners
Choose corner brackets (easiest) or notched joints (more traditional). For brackets, attach them to the outside corners with 2 screws each. For notched joints, cut a 45-degree angle on the ends of the shorter boards and secure with screws. - Step 3: Reinforce the Structure
Add 2x4 supports inside the frame at 2-foot intervals for extra stability. This prevents warping and ensures your bed stays square over time. Use 2.5-inch screws to attach these supports. - Step 4: Add Pest Protection
Line the bottom of the bed with hardware cloth to block burrowing pests like gophers or moles. Staple it securely to the frame, leaving no gaps. This step is critical for long-term durability. - Step 5: Layer the Soil
Start with a 4-inch layer of cardboard to smother weeds, then add 6 inches of compost, followed by 6 inches of topsoil. Mix in organic matter like aged manure or leaf mold for nutrient-rich soil. - Step 6: Final Touches
Level the bed on gravel or pavers for drainage, and add landscape fabric underneath if needed. Fill with your chosen plants, water thoroughly, and mulch to retain moisture.
One of the most common mistakes I see is skipping the hardware cloth—this can lead to pest infestations that ruin your hard work. Another pitfall is using untreated lumber, which can rot quickly.
If you’re on a budget, pine lumber works fine, but seal it with non-toxic wood preservative to extend its life. For extra longevity, consider composite lumber, though it’s pricier.
Once your bed is assembled, place it in a location with 6+ hours of sunlight for most vegetables. If you’re growing leafy greens, partial shade is fine. Water deeply in the morning to encourage strong root growth, and avoid walking on the bed to prevent soil compaction.
With these steps, your 2x4 raised garden bed will be ready for planting in no time!
Pro tip: If you’re building multiple beds, use the same screw pattern for consistency. Label your lumber before cutting to avoid mistakes, and always wear safety glasses when using power tools. Happy gardening!