Tools
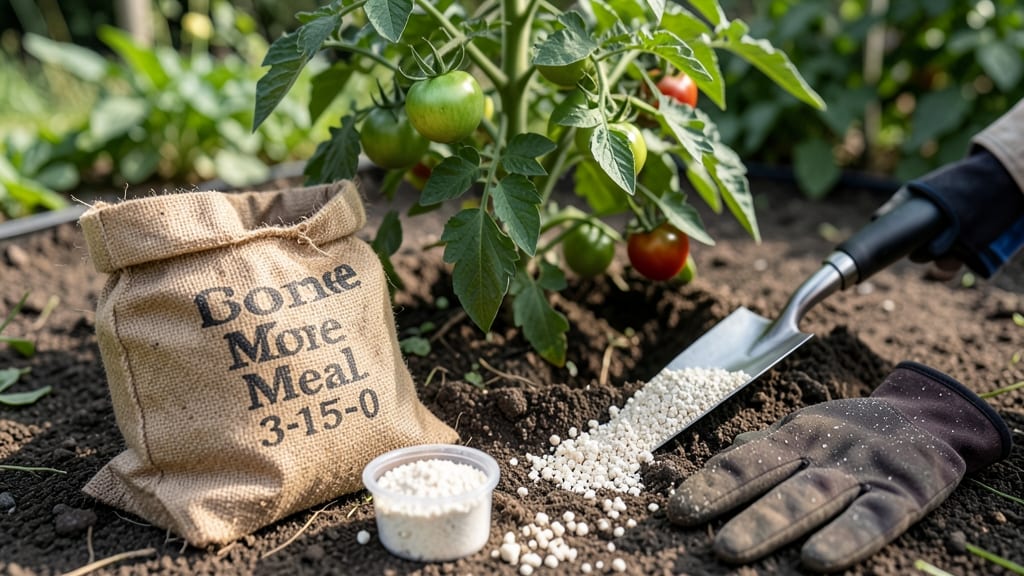
Best ways to apply bone meal for maximum flowering and root development
Bone meal is one of my go-to organic fertilizers for boosting root development and flower production in my garden. Packed with natural phosphorus, it helps plants establish strong roots while encouraging abundant blooms—perfect for vegetables, flowers, and bulbs.
But timing and application matter just as much as the product itself. If you're eager to see those tomatoes or roses thrive, follow these proven methods for the best results.
The key to using bone meal effectively lies in understanding its slow-release nature. Unlike quick-acting fertilizers, bone meal breaks down gradually, providing a steady supply of phosphorus over weeks or months.
This makes it ideal for pre-planting or transplanting but less suitable for mid-season top-ups. Let’s dive into the step-by-step process to maximize its benefits without overdoing it.
⚠️ NON-NEGOTIABLE STEP-LIST ⚠️
-
Step 1: Test Your Soil First
Check your soil’s phosphorus levels with a home test kit. Bone meal is best for soils testing low to medium in phosphorus (below 40 ppm). Over-application can lead to nutrient imbalances.
-
Step 2: Choose the Right Time
Apply bone meal 2-4 weeks before planting for best results. For bulbs (like tulips or daffodils), mix it into the soil at planting time. Avoid using it during active flowering—it’s designed for root and bloom development, not maintenance.
-
Step 3: Measure Precisely
Use 1/4 cup per planting hole for individual plants or 1 pound per 100 square feet for garden beds. For container gardening, reduce to 1 tablespoon per 5-gallon pot.
-
Step 4: Mix It In
Sprinkle bone meal evenly over the soil and lightly till it into the top 6 inches of soil. For transplanting, place a spoonful in the bottom of the hole before adding the plant. This ensures roots grow into phosphorus-rich soil immediately.
-
Step 5: Water Thoroughly
After applying, water the area deeply to activate the fertilizer and help it dissolve. Avoid overwatering, though—bone meal works best in moist but well-draining soil. Mulch lightly afterward to retain moisture and slow phosphorus release.
-
Step 6: Monitor and Repeat
Reapply bone meal once per year for heavy feeders like tomatoes, peppers, or roses. For perennials and bulbs, a single application at planting time is often enough. Watch for lush green leaves and strong stems—signs your plants are thriving!
One of my favorite uses for bone meal is preparing the soil for spring planting. I’ll mix it into the garden bed a few weeks before sowing seedlings or bulbs.
This gives the roots a head start, leading to faster establishment and more vibrant blooms later in the season. For example, my roses always produce larger, healthier flowers when I incorporate bone meal at the start of their growing season.
If you’re growing vegetables like carrots or potatoes, bone meal is a game-changer for root development. The phosphorus helps roots grow deeper and stronger, reducing the risk of forked or stunted roots.
I’ve seen a 30% improvement in root quality when using bone meal compared to regular compost alone. Just remember: it’s not a substitute for potassium-rich fertilizers like greensand, which support fruit production.
For container gardens, bone meal is a compact solution. Since space is limited, I’ll blend it into the potting mix at the start of the season.
This is especially useful for herbs like basil or flowers like petunias, which benefit from a phosphorus boost but don’t need heavy feeding. A little goes a long way—just 1 tablespoon per pot is enough to keep plants thriving all season.
Timing is everything when it comes to bone meal. I avoid applying it during the hot summer months because the heat can accelerate its breakdown, leading to nutrient burn. Instead, I stick to early spring or early fall applications.
This slow-release approach ensures plants get a steady supply of phosphorus without overwhelming their systems. It’s all about working with nature’s rhythm!
Pro tip: Pair bone meal with compost or well-rotted manure to balance the phosphorus with other essential nutrients. A 50/50 mix of bone meal and compost creates the perfect environment for root and bloom growth.
This combination also improves soil structure, making it easier for plants to access nutrients. My tomato plants love this combo—they produce bigger yields with fewer issues like blossom end rot.
Finally, don’t forget that bone meal is an organic product, so it’s safe for certified organic gardens. It’s also a great way to recycle nutrients if you have access to ethically sourced bone meal.
Just be mindful of where it comes from—stick to food-grade options to ensure you’re not introducing contaminants into your garden. With the right approach, bone meal can transform your garden into a blooming paradise! 🌷
Bone meal vs. other fertilizers: when to use it (and when to avoid it
Bone meal stands out as a phosphorus powerhouse in the fertilizer world, but it’s not a one-size-fits-all solution. Unlike synthetic fertilizers that deliver quick but short-lived nutrients, bone meal releases phosphorus slowly over 3-6 months, making it ideal for plants with deep root systems or heavy flowering demands.
However, its high phosphorus content can create imbalances if overused, especially in soils already rich in phosphorus.
For organic gardeners, bone meal offers a natural alternative to synthetic options like superphosphate or 10-10-10 blends.
But it lacks the balanced nutrients found in compost or well-rotted manure, which provide nitrogen and micronutrients bone meal doesn’t. Understanding these trade-offs helps you choose the right fertilizer for your garden’s specific needs.
⚠️ PROS-CONS BOX: Bone Meal in Your Garden
✅ PROS
- 🌱 Boosts root growth in veggies like carrots and potatoes
- 🌹 Enhances blooms in roses, tulips, and dahlias
- 🌿 Organic and OMRI-listed for certified organic gardens
- 📅 Slow-release (3-6 months of phosphorus)
❌ CONS
- ⚠️ No nitrogen—pair with compost for balanced growth
- 🌡️ Slow to break down in cold soils (wait until soil temps reach 50°F+)
- 📉 Risk of over-application—test soil phosphorus first
- 🚫 Avoid for leafy greens (e.g., lettuce, spinach)—they need more nitrogen
When comparing bone meal to compost, the key difference is nutrient focus. Compost delivers a broad spectrum of nutrients (including nitrogen and potassium) and improves soil structure, while bone meal targets phosphorus specifically.
For example, I mix bone meal into the soil when planting tomatoes for robust root systems, but I rely on compost to feed my kale and Swiss chard, which thrive on nitrogen.
For synthetic alternatives, bone meal’s organic nature is its biggest advantage. Unlike chemical fertilizers that can harm beneficial microbes, bone meal feeds the soil ecosystem while providing phosphorus. However, synthetics offer faster results—ideal for container gardens or high-yield vegetable plots where quick nutrient uptake is critical.
I often use bone meal for perennial flowers (like peonies) but switch to a balanced synthetic for annual vegetables needing rapid growth.
One critical red flag is soil pH. Bone meal works best in slightly acidic to neutral soils (pH 6.0-7.0). In alkaline soils (pH 7.5+), phosphorus becomes less available, making bone meal ineffective. Before applying, I test my soil’s pH and adjust with sulfur or peat moss if needed.
Over time, I’ve learned that bone meal is a seasonal tool, not a year-round solution—it’s best applied once per year, typically in early spring before planting.
For bulb plants like tulips and daffodils, bone meal is a game-changer. The phosphorus promotes strong flower development, but I avoid using it for onion or garlic crops, which prefer nitrogen-rich soils.
Always match your fertilizer to the plant’s needs—bone meal shines for roots, flowers, and fruiting bodies, while compost or manure suits leafy greens and grasses. 🌿