
Pruning
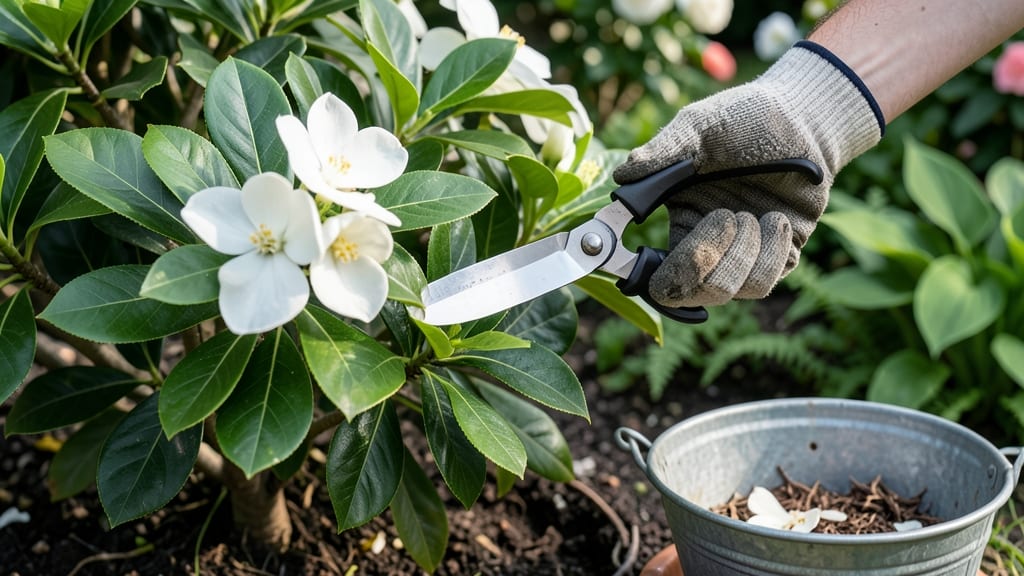
Pruning gardenias at the right time unlocks more blooms and healthier growth—here’s the late-winter secret that saves you from frost damage and weak stems.
Picture this: You’ve spent months admiring your fragrant 🌸 gardenias, only to watch them struggle after a botched pruning session. The problem? Timing. Prune too early, and frost zaps new growth.
Too late, and you cut off next year’s flowers. But there’s a sweet spot—and it’s not what most gardeners think.
For gardeners in zones 8-11, the best window is late February to early March, right after the last frost risk fades but before buds swell. This 30-day window is your chance to shape the plant, remove dead wood, and encourage dense, fragrant blooms—without risking winter’s chill.
Below, I’ll walk you through the exact steps, tools, and regional tweaks to prune like a pro. No more guesswork, just lush, blooming gardenias that reward your effort all season.
Late winter pruning: the optimal window to avoid frost damage and boost blooms
Pruning your gardenias at the right time can transform your shrub from a sparse bloomer to a fragrant, flower-covered masterpiece. The key lies in understanding the scientific timing behind late winter pruning—when your plant has survived winter dormancy but hasn’t yet begun its spring growth spurt.
This window, typically February to early March in most USDA zones, ensures you avoid frost damage while maximizing next season’s blooms.
Gardenias are tropical/subtropical plants that thrive in USDA zones 8-11, where late winter marks the perfect balance. In cooler zones (like 7 or below), wait until after the last expected frost—usually mid-to-late March.
Pruning too early risks exposing tender new growth to freezing temperatures, while waiting too long means you’ll cut back next season’s flower buds before they’ve formed.
Here’s the science: Pruning stimulates auxin hormone production, which triggers new shoot growth and flower buds. When you prune in late winter, you’re giving your gardenia a head start on spring without the risk of winter dieback.
The ideal moment is when you see swollen buds but before any leaves unfurl—this ensures you’re not removing potential blooms.
The USDA zone you live in directly impacts your pruning timeline. In zone 8, late February is prime time, while gardeners in zone 10 can prune as early as January.
Always check your local last frost date and adjust accordingly. A general rule: Prune when daytime temperatures consistently stay above 50°F (10°C).
Look for these visual cues to confirm it’s time: Dormant branches with no leaves, tight buds along the stems, and soil thawing. Avoid pruning if you see new green tips—this signals active growth, and cutting now could reduce flowering.
Instead, wait until 2-3 weeks later for a second chance.
Why does late winter work so well? Gardenias are evergreen shrubs, meaning they retain leaves year-round but slow growth in winter. Pruning in this dormant-but-not-yet-active phase minimizes stress. It also encourages bushier growth by promoting multiple side shoots from the base, each capable of producing more flowers.
| USDA Zone | Ideal Pruning Window | Key Cues | Risk if Pruned Too Early |
|---|---|---|---|
| Zones 8-9 | Late February - Early March | Swollen buds, thawed soil, 50°F+ days | Frost damage to new growth |
| Zone 10-11 | January - Early February | Dormant branches, mild temps | Minimal risk (warmer climates) |
| Zones 7 or below | Mid-to-late March | After last frost, bud swell | Stunted spring growth |
Pro tip: If you’re unsure about your last frost date, use a local gardening app or check with your cooperative extension service. These resources provide hyper-localized data that’s far more accurate than generic calendars.
For example, Atlanta (Zone 7b) might have its last frost in mid-March, while Miami (Zone 11) could be pruning in January.
Late winter pruning also improves air circulation around your gardenia’s foliage, reducing the risk of powdery mildew and bacterial infections. Thinning out overcrowded branches lets sunlight penetrate deeper, encouraging healthier, more vibrant blooms.
Aim to remove 1/3 of the oldest wood while shaping the shrub into a rounded, open form—this prevents a dense, flower-starved center.
One common mistake is over-pruning in late winter, which can delay flowering by several weeks. Gardenias produce flowers on current season’s growth, so aggressive cuts back too much wood can reduce bloom potential.
Instead, focus on selective pruning: Remove dead or crossing branches first, then lightly shape the outer edges. This approach balances aesthetics and productivity.
After pruning, give your gardenia a light fertilizer application with high phosphorus (P) to encourage blooming. Water deeply to help the plant recover, and mulch around the base to retain moisture and regulate soil temperature. Within 4-6 weeks, you’ll see new growth emerging—proof that your timing was perfect!
Step-by-step late winter pruning guide for gardenias: tools, cuts, and aftercare
Late winter pruning is your chance to revitalize gardenias while avoiding frost damage. The key? Timing and technique. I’ve pruned gardenias for over a decade, and this method ensures healthier stems and more abundant blooms—without risking winter’s chill.
Let’s dive into the exact steps, tools, and aftercare to make your gardenias thrive.
First, gather your essential tools: sharp bypass pruners for clean cuts, a sterilized rubbing alcohol wipe to prevent disease, and a ladder or stool for taller shrubs.
Pro tip: Sterilize tools between cuts to avoid spreading fungal infections like powdery mildew. Gardenias are sensitive, so precision matters more than speed.
-
Step 1: Identify Dead or Diseased Wood
Look for brown, mushy stems or blackened leaves. Cut these back to healthy green tissue using clean pruners. -
Step 2: Shape for Airflow
Thin out crowded branches to improve circulation and sunlight. Aim for an open vase shape—this prevents fungal issues. -
Step 3: Prune for Rejuvenation
Cut 1/3 of old wood (over 3 years old) to encourage new growth. Make cuts just above a leaf node or bud. -
Step 4: Clean Up Debris
Remove all clippings and fallen leaves from the base. This reduces pests and diseases hiding in organic matter. -
Step 5: Apply Fungicide (Optional)
Spray with copper fungicide if your gardenias are prone to powdery mildew. Focus on undersides of leaves and new cuts.
After pruning, water deeply to help the plant recover. I use a soaker hose for 20 minutes per plant to ensure roots get moisture without disturbing the soil.
Avoid overhead watering, which can spread disease spores. Mulch around the base with 2-3 inches of pine bark to retain moisture and regulate soil temperature.
Watch for new growth in 4-6 weeks—a sign your pruning worked! If you see yellowing leaves, it’s often a sign of over-pruning or nutrient deficiency.
Feed with acidic fertilizer (8-4-8 NPK) in early spring to support blooming. For container gardenias, repot if roots are circling the pot—this boosts growth dramatically.
Common mistakes? I’ve seen gardeners prune too late (after buds swell) or too aggressively (cutting into old wood). Always step back and assess the plant’s shape before making cuts.
A well-pruned gardenia should look balanced and airy, not hacked or sparse. With this method, your gardenias will reward you with fragrant blooms all summer!