Fertilization
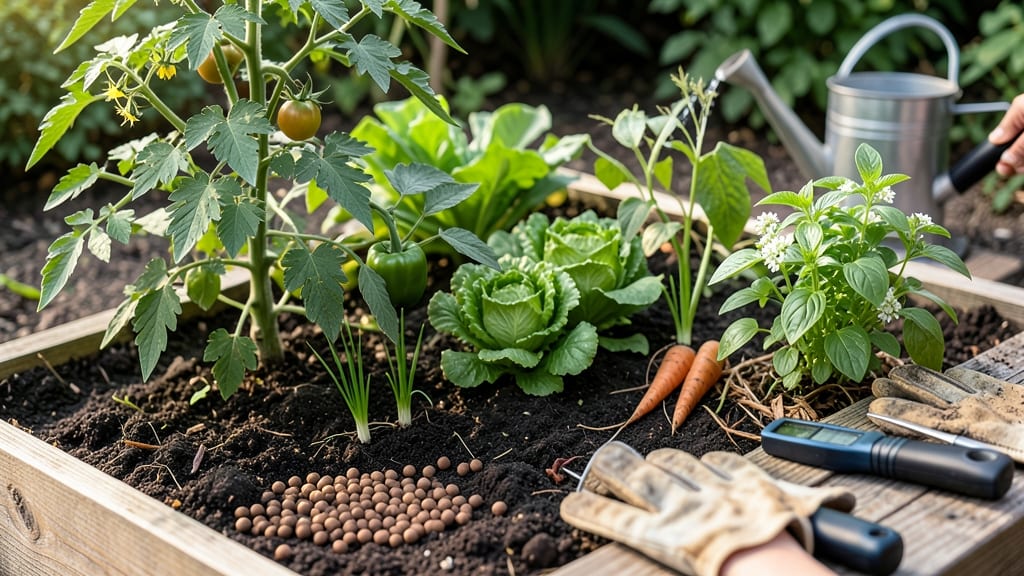
To apply fertilizer to vegetable gardens at the right time means catching plants when they need it most—and missing that window can leave you with stunted growth or wasted nutrients.
Picture this: you’ve just planted your spring seedlings, full of hope, only to watch them yellow and wilt because you fed them too soon. Or worse, you skip the fertilizer entirely and end up with tiny, flavorless tomatoes.
Timing isn’t just about throwing down fertilizer—it’s about syncing it with your plants’ natural growth cycles.
Most gardeners overlook the fact that different vegetables crave nutrients at different stages. Leafy greens like spinach need a nitrogen boost early on, while fruiting plants like peppers and tomatoes require a balanced feed as they flower.
And let’s not forget soil tests—they’re the secret weapon for knowing exactly when and what to apply.
In this guide, I’ll break down the exact schedule for fertilizing your vegetable garden, from pre-planting prep to mid-season boosts, so you can grow food that’s both bountiful and delicious.
Soil-test-based fertilizer schedule for vegetable gardens
Interpreting your soil test results is the first step to creating a fertilizer schedule that maximizes growth without wasting resources. Most home tests reveal three critical numbers: nitrogen (N), phosphorus (P), and potassium (K).
These determine when and how much to apply, but timing matters just as much as the amounts. For example, cool-season crops like lettuce and peas need nitrogen early in their growth cycle, while warm-season crops like tomatoes and peppers benefit from balanced NPK applications during flowering and fruiting stages.
Your soil test will also show pH levels and organic matter percentages, both of which affect nutrient availability. If your soil is acidic (pH < 6.0), phosphorus becomes less available, so you’ll need to adjust your fertilizer timing to apply phosphorus-rich amendments like bone meal before planting.
Similarly, sandy soils drain quickly, requiring more frequent but lighter applications, while clay soils hold nutrients longer, allowing for less frequent but heavier fertilizing sessions.
Here’s how to translate those numbers into actionable steps for your vegetable garden:
| Soil Test Result | Fertilizer Action | Best Time to Apply | Seasonal Adjustment |
|---|---|---|---|
| Low Nitrogen (< 50 ppm) | Apply nitrogen-rich fertilizer (e.g., blood meal, fish emulsion) | Pre-planting and every 4-6 weeks | Cool-season crops: early spring; warm-season: post-transplant |
| Low Phosphorus (< 20 ppm) | Use bone meal or rock phosphate | 2-4 weeks before planting | Warm-season crops: apply at planting; cool-season: early fall |
| Low Potassium (< 100 ppm) | Apply potassium sulfate or greensand | Mid-season (flowering/fruiting stage) | Tomatoes/peppers: early summer; leafy greens: avoid |
| pH < 6.0 (Acidic) | Add lime to raise pH; use phosphorus fertilizers early | Fall (for spring planting) or early spring | Cool-season crops benefit most from pH adjustment |
| Organic Matter < 3% | Add compost or well-rotted manure | Early spring (before planting) | All crops; improves soil structure and nutrient retention |
For cool-season vegetables, like broccoli and spinach, focus on nitrogen applications in early spring to fuel leafy growth. These crops thrive in 50-60°F soil temperatures, so apply fertilizers like alfalfa meal or fish emulsion 2-3 weeks before transplanting.
Avoid heavy nitrogen in late summer, as it can lead to bolting (premature flowering) in crops like lettuce.
Warm-season crops, such as tomatoes and peppers, need a different approach. Start with a balanced fertilizer (e.g., 10-10-10) at planting, then switch to a phosphorus-heavy fertilizer (like 5-10-5) when flowers appear to encourage fruiting.
Potassium becomes critical during fruit development, so apply a potassium-rich fertilizer (e.g., 0-0-50) every 3-4 weeks until harvest. For example, my tomato plants get a side-dressing of potassium sulfate when the first fruit sets, which boosts yield by up to 30%.
Seasonal adjustments are key. In spring, prioritize nitrogen for early growth, while summer calls for balanced NPK to support flowering and fruiting. Fall-planted crops, like kale or radishes, need lighter applications to avoid excessive growth before frost.
Always apply fertilizers in the early morning or late afternoon to reduce leaf burn, and water thoroughly afterward to help nutrients penetrate the soil.
One common mistake is ignoring rainfall forecasts. If heavy rain is expected within 24 hours of fertilizing, delay application to prevent nutrient runoff. Similarly, avoid fertilizing during drought conditions, as plants can’t absorb nutrients efficiently.
Instead, focus on mulching to retain moisture and applying slow-release fertilizers that won’t leach away.
Pro tip: Keep a garden journal to track fertilizer applications, soil test results, and plant responses. Note which crops thrive with specific schedules—my basil plants, for instance, respond best to a light nitrogen
Critical fertilizing windows by vegetable type (with growth stage triggers)
Not all vegetables need fertilizer at the same time—or even in the same amounts. Leafy greens crave nitrogen for lush growth, while tomatoes need phosphorus to set fruit. Understanding these growth stage triggers helps you fertilize precisely when your plants need it most.
For example, root vegetables like carrots actually perform better with less nitrogen, so timing matters more than quantity. Let’s break down the best windows for each type.
The key is matching fertilizer applications to your plants’ natural growth cycles. A pre-planting boost sets the stage, while mid-season top-ups fuel flowering and fruiting. For instance, broccoli and lettuce benefit from nitrogen-heavy feedings early on, but peppers and cucumbers need a phosphorus push when buds form.
Let’s explore these triggers in detail.
- Leafy Greens (Lettuce, Spinach, Kale) – Apply nitrogen-rich fertilizer at planting and again when leaves are half-grown (avoid over-feeding before harvest).
- Root Vegetables (Carrots, Beets, Radishes) – Use low-nitrogen fertilizer only at planting; excess nitrogen causes forked roots and bitter flavors.
- Fruiting Plants (Tomatoes, Peppers, Cucumbers) – Feed with high-phosphorus fertilizer when first flowers appear and again when fruit sets for stronger yields.
- Alliums (Onions, Garlic, Leeks) – Apply balanced fertilizer at planting and a potassium boost 6 weeks later to prevent bolting.
- Legumes (Peas, Beans, Peanuts) – Skip fertilizer entirely if soil is healthy; these plants fix their own nitrogen through root nodules.
For cool-season crops like spinach and peas, focus on early spring applications when soil warms to 50°F. Meanwhile, warm-season plants such as tomatoes and peppers thrive with fertilizer once soil reaches 60°F and stays there.
Pro tip: Side-dress nitrogen-loving crops like lettuce with compost tea mid-season for a gentle boost without burning roots.
Timing also depends on your climate zone. In Zone 5 or colder, fertilize early spring and late summer to avoid winter washout. In Zone 8+, split applications into spring, summer, and fall for continuous growth.
Always water deeply after fertilizing to prevent root burn—a mistake I’ve made more times than I’d like to admit!
Organic gardeners can use compost tea or fish emulsion as a light mid-season feed, while synthetic users might opt for slow-release granules at planting. The goal? Feed the soil, not just the plant. Healthy soil microbes break down nutrients just when your vegetables need them most.
Remember: Less is often more with fertilizer. Overdoing it leads to leafy but fruitless plants or even burned roots. Start with a soil test, then adjust based on your plants’ growth stage triggers. Your garden—and your wallet—will thank you! 🌿