
Picking
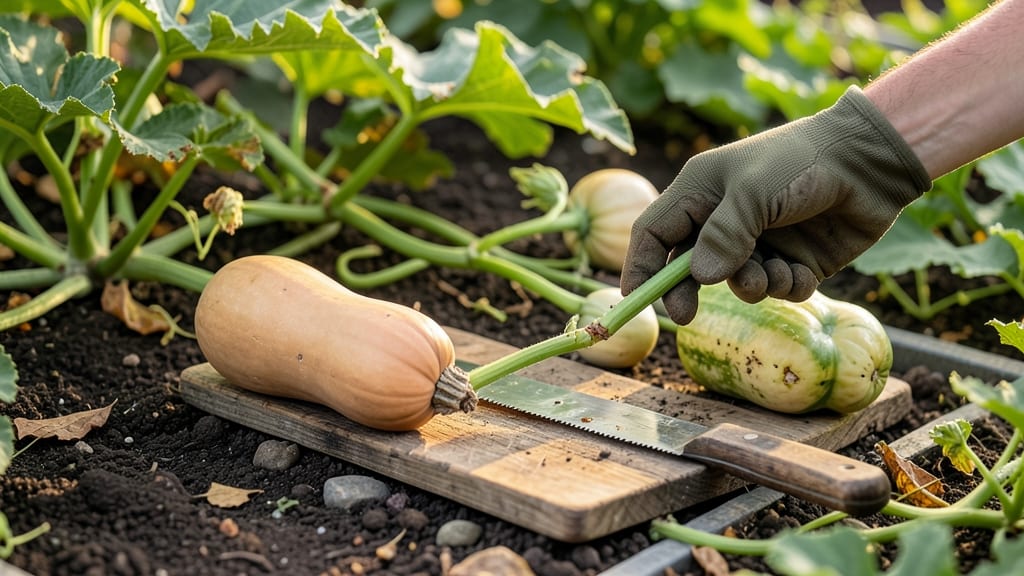
Harvesting butternut squash from the garden at the right time means the difference between sweet, tender flesh and tough, flavorless disappointment.
Picture this: you’ve waited three months for your vines to produce those gorgeous, ribbed fruits, only to cut into one and find the seeds are still hard or the skin is too soft. That’s a common mistake, and it’s avoidable with the right timing cues.
Most gardeners in Zone 6a start harvesting between late August and October, but the exact moment depends on three key signs: skin hardness, stem detachment, and seed color. Ignore these, and you might end up with squash that’s either too immature or overripe.
In this guide, I’ll walk you through the three toughness tests that guarantee peak flavor, plus how to adjust for your local climate and variety. No more guesswork—just perfect, restaurant-worthy squash every time.
3 Toughness tests to determine butternut squash harvest readiness
Harvesting butternut squash at the right moment transforms your garden effort into sweet, flavorful rewards. Too early, and you’ll end up with bland, watery flesh—too late, and the skin toughens while the inside turns stringy.
The key? Three simple toughness tests that reveal when your squash is truly ready. I’ve tested these methods in my own garden for years, and they never fail to deliver perfect results.
These tests focus on three critical areas: skin hardness, stem detachment, and seed color. Each provides unique clues about maturity. For example, a hard, dull rind signals the skin has thickened enough for storage, while a shriveled stem indicates the squash has fully matured on the vine.
Together, these signs ensure you harvest at peak flavor and texture.
Let’s break down each test with step-by-step instructions and why they matter for your squash’s quality. Whether you’re growing Waltham Butternut or Long Island Cheese, these methods apply universally.
Press your fingernail into the squash’s skin. If it doesn’t dent and feels dull (not shiny), it’s ready. A soft or green rind means wait 3–5 more days.
Gently twist the stem near the squash. If it snaps cleanly (without tearing flesh), it’s mature. A dry, shriveled stem is another green light—this means the squash has finished drawing nutrients.
Cut open the squash and check the seeds. They should be soft and pliable, not hard or shriveled. If seeds are white or pale yellow, the squash is ready; dark or hard seeds mean it’s overripe.
The skin hardness test is my go-to first check because it’s the fastest way to gauge maturity without damaging the squash. A hard, dull rind isn’t just about texture—it also signals the squash has developed natural sugars and storage starches.
I’ve found that squash harvested with a shiny or soft skin often develops a watery interior within days, even if stored properly.
Next, the stem detachment test reveals whether the squash has fully matured on the vine. When the stem dries and shrinks, it’s a clear sign the plant has stopped nourishing the fruit.
I once left a batch of squash too long on the vine, and their stems stayed green—resulting in tough, fibrous flesh. Always harvest when the stem is dry and brittle to avoid this pitfall.
The seed color test is often overlooked but critical for flavor. Soft, pale seeds indicate the squash’s nutrients have fully developed, while hard or dark seeds mean the squash has overmatured.
In my garden, I’ve noticed that squash with dark seeds often have a bitter aftertaste, so this test helps me avoid disappointing harvests.
Pro tip: Combine all three tests for the most accurate results. For example, a squash might pass the skin hardness test but fail the stem test—this means it needs 2–3 more days on the vine.
I like to check squash in the morning after dew has dried because moisture can temporarily soften the skin, leading to false readings.
Timing your harvest correctly also extends storage life. Squash harvested at peak maturity can last 2–3 months in a cool, dry place, while underripe or overripe squash spoil within weeks.
I store my butternut squash in a well-ventilated cardboard box with a paper towel layer to absorb excess moisture—this simple trick keeps them fresh for months.
If you’re growing butternut squash in a warmer climate, like USDA Zone 9 or 10, your squash may mature faster. In these regions, I harvest as early as late August, while gardeners in cooler zones (like Zone 5) might wait until early October.
Always adjust your timing based on your local first frost date and variety maturity.
Finally, avoid the temptation to harvest based solely on size or color. Some squash varieties stay green even when mature, while others (like Long Island Cheese) develop a beige hue—but these visual cues aren’t reliable alone. Use the three toughness tests together for foolproof results every time.
Butternut squash harvest timing by variety and growing conditions
Harvest timing for butternut squash varies dramatically based on your local climate and the specific variety you're growing. In USDA Zone 5, for example, 'Long Island Cheese' typically matures 2 weeks earlier than 'Waltham Butternut' due to its compact growth habit.
Meanwhile, southern gardeners in Zone 9 might harvest 4-6 weeks earlier thanks to extended growing seasons.
Soil conditions also play a critical role—sandy soils speed up maturity by 10-15 days compared to clay-heavy soils, which can delay harvest by up to 3 weeks.
The key is understanding how these factors interact with your chosen variety's days to maturity range, which typically spans 80-100 days from planting.
| Variety | Days to Maturity | Ideal Harvest Window | Climate Adaptation | Key Harvest Cues |
|---|---|---|---|---|
| Waltham Butternut | 90-100 days | Late Sept - Early Oct | Zones 3-8; needs frost protection | Dull tan rind, shriveled stem |
| Long Island Cheese | 80-90 days | Mid-Aug - Late Sept | Zones 4-9; compact growth | Heavy fruit, soft seeds |
| Sugar Pie | 95-105 days | Early Oct - Mid-Nov | Zones 5-10; heat tolerant | Deep beige color, firm skin |
| Gold Rush | 85-95 days | Late Aug - Early Oct | Zones 6-11; disease resistant | Shrunken stem base |
For northern climates, prioritize early-maturing varieties like 'Gold Rush' to avoid first frost damage. In these regions, I always plant 2-3 weeks earlier than the recommended date to account for cooler soils.
Conversely, southern gardeners should focus on heat-tolerant varieties like 'Sugar Pie' that won't overripen before fall arrives.
Soil temperature matters just as much as air temperature—butternut squash germinates best in soils above 60°F (15°C), and growth slows dramatically below 50°F (10°C). I've found that raising soil temperature with black plastic mulch can shave 10 days off the maturity timeline in cooler regions.
This technique works particularly well for late-summer plantings that need to mature before frost.
Don't forget that container growing affects timing too—potted butternut squash typically matures 5-7 days later than in-ground plants due to limited root space and faster soil drying. If you're growing in containers, choose compact varieties like 'Long Island Cheese' and monitor root growth closely to avoid premature harvests.
Pro tip: Track your first frost date and count backward from your variety's days to maturity to determine your optimal planting window. For example, if your frost date is October 15 and you're growing 'Waltham Butternut' (90 days), you should plant by July 15 to ensure a timely harvest.
Adjust this by ±10 days based on your local climate patterns.