
Picking
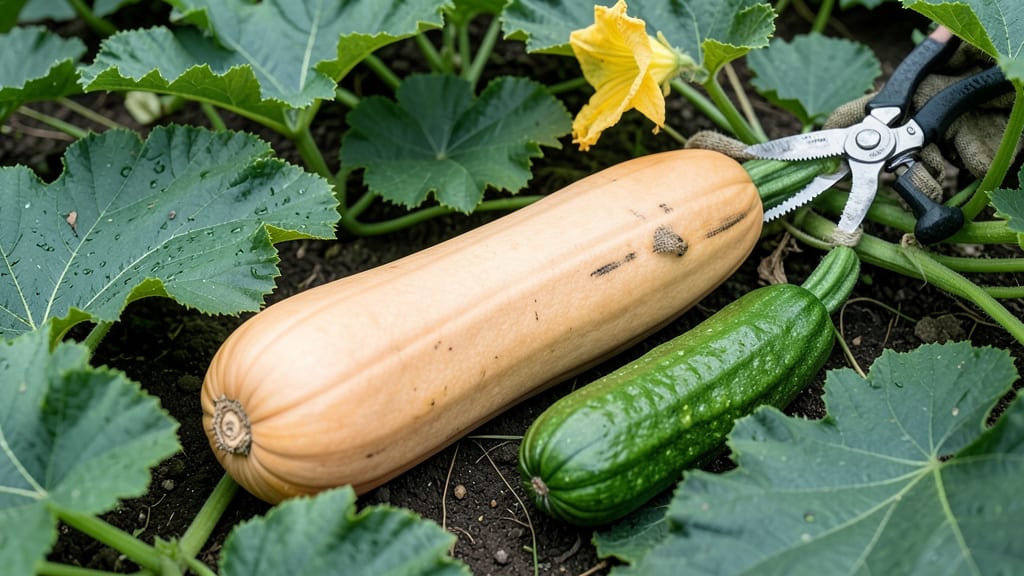
Harvesting spaghetti squash from the garden at the right time means the difference between tender, string-free strands and tough, bitter flesh — and the key is watching for those subtle shifts in color and texture.
Picture this: you’ve nurtured your 🎃 from seed, and now the vines are yellowing while the squash sits heavy in the vine. But is it really ready? One wrong move, and you’ll end up with a meal that’s either too fibrous or still underripe.
Below, I’ll walk you through the exact signs to look for — from seed color changes to the "tender-point" test — so you never guess again.
Timing matters because spaghetti squash doesn’t ripen after picking. Miss the window, and you’ll sacrifice flavor and texture. In Zone 6a, that means aiming for late summer to early fall, but climate and variety play a role too.
I’ll break down how to adjust for your specific growing conditions and how to store any squash you can’t harvest quite yet.
By the end, you’ll know exactly when to grab your knife — and how to turn every harvest into a restaurant-worthy dish. Let’s get started.
How to identify spaghetti squash harvest time by seed color & skin changes
Harvesting spaghetti squash at the perfect moment transforms your garden bounty into a delicate, string-free feast. The key lies in observing two critical visual cues: the transformation of seed color inside the squash and the skin's texture and color.
When these signs align, you’ve hit the sweet spot for harvesting.
Most gardeners focus on the external skin changes, but the seed color shift is equally telling. Inside a ripe spaghetti squash, the seeds change from white to bright yellow, signaling peak sweetness.
This internal transformation often happens just before the skin matures externally, so keep your eyes peeled for both clues.
Don’t overlook the skin's firmness—it’s your final check before harvesting. A ripe squash should feel hard to pierce with a fingernail but still yield slightly when pressed. If the skin gives too easily, the squash needs more time on the vine. Conversely, if it’s rock-hard, it may be overripe.
🎃 Visual Comparison Table: Spaghetti Squash Harvest Cues
| Harvest Stage | Seed Color | Skin Color | Skin Texture | Vine Condition |
|---|---|---|---|---|
| Not Ready | White | Green | Soft, tender | Green, vigorous |
| Perfectly Ripe | Bright yellow | Dull yellow | Firm, resists fingernail | Yellowing, dying back |
| Overripe | Dark yellow/brown | Mottled, soft spots | Rock-hard or mushy | Dead, brown vines |
The dull yellow skin is your primary external cue, but combine it with the seed color check for accuracy. To test the seeds, cut a small slice near the stem—if the seeds inside are bright yellow, it’s time to harvest.
This method works even if the skin hasn’t fully yellowed yet, giving you a head start on perfect timing.
Pay attention to the stem's condition too. When the stem begins to dry out and separate from the squash, it’s another sign of ripeness. However, avoid harvesting if the stem is still green and attached firmly, as the squash likely needs more time.
This separation is often accompanied by the vines yellowing and dying back, a clear signal from nature.
Harvesting too early results in tough, fibrous strands that resemble overcooked spaghetti, while waiting too long can lead to bitter, seedy flesh. The ideal harvest window is when the squash is 80-100 days after planting, but visual cues should always take precedence over calendar dates.
Adjust for your climate—cooler regions may need an extra 10-14 days.
For container growers, these same rules apply, but monitor the squash daily in late summer since pots can dry out faster and affect ripening. If the skin turns yellow but the seeds remain white, leave it on the vine for 3-5 more days.
Patience here ensures you avoid the bitter, seedy disappointment of an underripe harvest.
Once you’ve confirmed ripeness, use a sharp pruning shear to cut the squash from the vine, leaving a 1-inch stem attached. This helps prevent rot during storage.
Store harvested spaghetti squash in a cool, dry place for up to 2 months, but plan to cook it within 3 weeks for the best texture and flavor.
Mastering these visual cues turns spaghetti squash harvesting from guesswork to science. Soon, you’ll be picking squash at the perfect moment, every time—no bitter surprises in sight! 🌱
Step-by-step guide to testing spaghetti squash ripeness before picking
Harvesting spaghetti squash at the right moment ensures tender, string-free strands instead of tough, fibrous flesh. The key lies in combining visual cues with hands-on tests. I’ve learned the hard way that waiting too long can turn your squash into a chewy disappointment, while picking too early means wasted effort.
Let’s break down the foolproof methods I use every harvest season.
Start by checking the skin color—ripe spaghetti squash transitions from bright green to a dull yellow. This change signals the squash has reached its sugar peak. Next, examine the stem—it should dry out and separate easily from the squash, leaving a small stem cap behind.
These visual clues set the stage for the hands-on tests that confirm ripeness.
How to Test Spaghetti Squash Ripeness
- 🎃 Thump Test: Gently tap the squash with your knuckle. A ripe one will sound hollow, like knocking on a wooden door. If it thuds like a watermelon, it’s not ready.
- 👉 Skin Indentation Test: Press your fingernail into the skin. If it springs back slowly, the squash is ripe. If it leaves a dent, it’s overripe. If it bounces back instantly, it’s underripe.
- 🌿 Stem Separation: Gently twist the stem. If it separates cleanly with minimal resistance, your squash is perfect for harvest. A stubborn stem means it needs more time.
- ⏰ Vine Condition: Check the vines. If they’ve started yellowing and dying back, it’s a strong sign your squash is ready. Healthy green vines mean you should wait a few more days.
One mistake I see often is relying only on color—some squash stay green longer, especially in cooler climates. Always combine the thump test with the skin indentation to avoid errors.
For example, my organic heirloom varieties often pass the color test but fail the thump test if harvested too early.
Harvesting too early results in underdeveloped strands that fall apart when cooked. Overripe squash, on the other hand, develops a hard, woody texture and bitter flavor. I’ve salvaged overripe squash by roasting it with honey and spices, but it’s far inferior to properly timed harvests.
The goal is to pick when the squash is firm but tender—like a ripe cantaloupe.
Timing matters too—most spaghetti squash varieties mature in 80-120 days, but cooler weather can extend this. In my Zone 6a garden, I start checking ripeness in early September.
If frost threatens before your squash ripens, harvest it anyway and cure it indoors for a few days to improve flavor. Just be prepared for slightly firmer texture.
Pro tip: Use a sharp pruning shear to cut the squash from the vine, leaving a 1-inch stem attached. This prevents bruising and extends storage life. After harvesting, store your squash in a cool, dry place (50-55°F) where it’ll keep for up to 2 months.
Happy harvesting—your future spaghetti dishes will thank you!