
Picking
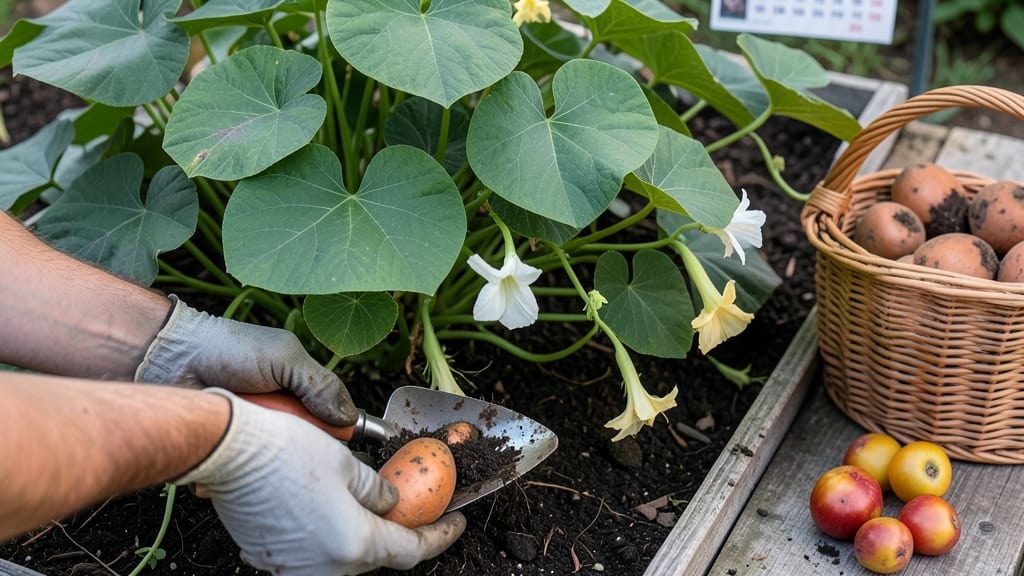
Picking sweet potatoes at the right time turns your garden into a treasure trove of flavor and storage potential—if you know the skin slip test and vine dieback signs.
Picture this: you’ve nurtured your 🍠 plants all season, but harvest too early and you’re left with small, bland tubers. Wait too long and they turn woody and dry. The difference between a perfect harvest and a disappointing one often comes down to timing.
In this guide, I’ll walk you through the exact conditions to watch for—soil temperature, frost risk, and leaf color changes—that signal it’s time to dig. Whether you’re in a warm climate or a short-season zone, you’ll learn how to avoid common mistakes that ruin your crop.
Ready to master the art of harvesting? By the end, you’ll know exactly when to pull those sweet potatoes for the best flavor and longest storage life.
How to perform the skin slip test for perfect sweet potato harvest timing
Sweet potatoes are ready to harvest when their skin slips easily from the flesh—a simple test that saves you from digging up underripe or overmature tubers. This non-destructive method lets you check readiness without harming the plant, making it my go-to trick for peak sweetness and storage potential.
The test works by assessing skin toughness and color changes, two key indicators that your tubers are finally ready to pull from the soil.
Start testing 4-6 weeks after flowering, when sweet potatoes typically begin tuber formation. Most varieties need 90-140 days from planting to reach harvest maturity, but the skin slip test gives you a precise cue rather than relying solely on days.
Warm climates may speed up this process, while cooler regions might extend it—so always adjust based on your local growing season. I’ve found that testing too early (before 80 days) often yields small, starchy tubers, while waiting too long risks woody, dry flesh.
Here’s how to perform the test correctly: Choose a sunny, dry day to avoid muddy soil complicating the process. Gently dig up one test tuber from the outer edges of the plant (where roots are often largest).
If the soil is too wet, wait a day or two—moisture can skew results by making the skin appear softer than it is. Use a hand trowel to expose just enough of the tuber to assess its readiness without damaging the rest of the plant.
- Step 1: Select a healthy vine with yellowing leaves (sign of natural dieback).
- Step 2: Gently dig near the vine (6-12 inches away) to expose a single tuber.
- Step 3: Hold the tuber firmly and slide your thumbnail across the skin.
- Step 4: If the skin slips easily (separates from flesh), it’s ready to harvest.
- Step 5: Check skin color: Ideal hues are golden, reddish, or purple (varies by variety).
- Step 6: If skin resists slipping or is still soft, wait 5-7 more days and retest.
The skin slip test isn’t just about texture—color matters too. For example, Beauregard varieties should show a deep orange skin, while Georgia Jet turns a rich red. If the skin is still green or pale, the tuber needs more time in the ground.
I once harvested a batch of pale-skinned sweet potatoes because I ignored the color cue, and they tasted bland compared to the vibrant orange tubers I tested later. Always pair the slip test with a quick visual check for the best results.
What if the skin slips but the tuber feels small or shriveled? This could mean drought stress or over-maturity. In my garden, underwatering in late summer once caused tubers to shrink despite passing the slip test.
To avoid this, water deeply (1-2 inches per week) during tuber formation, but reduce watering 2 weeks before harvest to concentrate sugars. Overwatering, on the other hand, can lead to soft, waterlogged tubers—so always aim for consistent, not soggy, moisture.
Timing your harvest with the skin slip test ensures maximum sweetness and longer storage life. Tubers harvested at this stage develop a protective layer that resists rot during curing (the process of hardening their skin post-harvest).
If you harvest too early, the skin won’t toughen enough, and the tubers may spoil quickly. Conversely, overripe tubers (skin cracks or shrinks) lose their moisture and sweetness, making them ideal for immediate cooking but poor for storage.
Regional differences play a role too. In short-season zones (like Zone 5), I start testing earlier (around 100 days) because frost threatens before tubers fully mature. In long, hot climates (Zone 9+), I wait until late October or November, even if vines die back sooner.
Always monitor local frost dates—sweet potatoes cannot tolerate frost, so harvest before temperatures drop below 50°F (10°C). If frost hits, dig up all remaining tubers immediately, even if they’re not fully mature.
Once you’ve confirmed readiness with the skin slip test, harvest on a dry, sunny day to let tubers cure properly. Avoid washing them—dirt acts as a natural barrier against rot.
Instead, brush off excess soil and let them air-cure in a warm (80-85°F), humid (80-90%) space for 5-10 days. This step deepens flavor and extends shelf life to 4-6 months when stored in a cool (55-60°F), dark place.
Skipping curing turns sweet potatoes into starchy, short-lived disappointments—so never rush this process!
Mastering the skin slip test transforms guesswork into precision harvesting. Next time you’re tempted to dig up a tuber "just to check," resist the urge—wait for the skin to slip and the vines to yellow.
Your taste buds (and your storage bin) will thank you for the perfectly timed harvest. Happy digging!
Signs your sweet potato vines are ready: dieback, leaf color, and root development
Beyond the skin slip test, your sweet potato plants send clear signals when they're ready for harvest. Watch for vine dieback—when the vines turn yellow, wilt, and eventually dry up.
This natural process indicates the plant is redirecting energy to the tubers below ground, a key sign of maturity.
Don’t wait for the vines to completely blacken or collapse—they should be mostly yellow with some brown patches. If you see green vines still thriving, your tubers likely need more time to develop their signature sweetness and texture.
| Sign | Description | Action |
|---|---|---|
| Vine Dieback | Vines turn yellow/brown and dry up | Harvest within 1-2 weeks |
| Leaf Color | Leaves yellow, then wilt | Test skin slip test |
| Root Size | Tubers 3-5 inches in diameter | Dig carefully to avoid damage |
| Skin Texture | Skin resists fingernail pressure | Harvest immediately for best flavor |
Leaf color changes are another reliable indicator. Healthy green leaves transition to yellowing foliage before wilting completely. This shift signals the plant is entering its final growth phase, but don’t mistake it for disease—it’s a natural part of the harvest maturation process.
Check for root development by gently probing the soil with your fingers. Mature tubers should feel firm and reach 3-5 inches in diameter. If they’re smaller, they’ll lack the sweetness and storage potential of fully developed roots.
Over-mature sweet potatoes develop woody, dry flesh and poor storage life. If your vines have turned completely brown and crispy, harvest immediately to avoid flavor degradation and storage failure. Curing becomes harder with over-mature tubers, too.
For best results, combine these signs with the skin slip test. When vine dieback, leaf yellowing, and firm tubers align, you’ve got a perfect harvest window—just don’t wait too long!