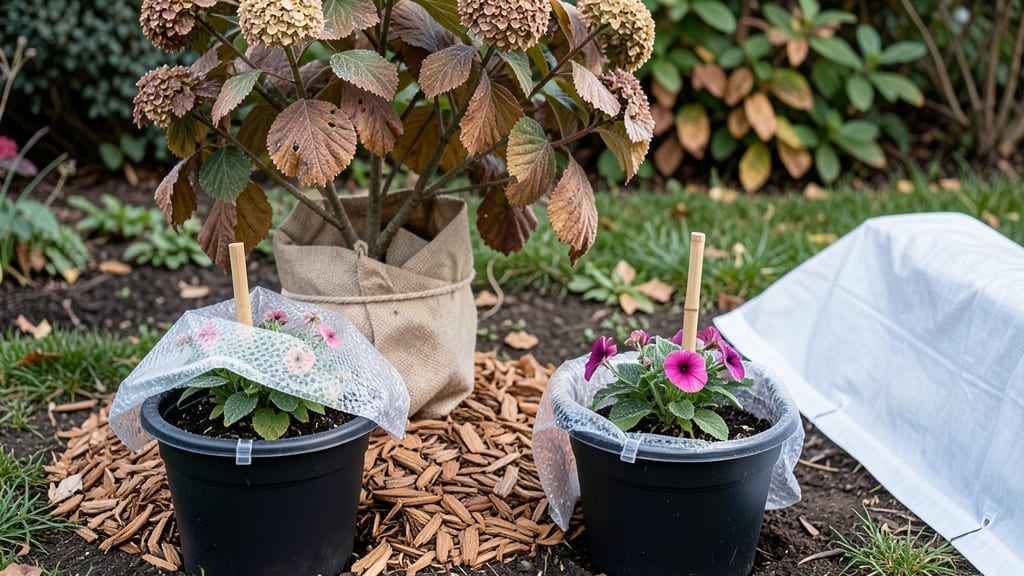
Winter protection for garden is the key to keeping plants alive through ❄️ cold snaps and saving you from springtime replanting headaches.
Picture this: You’ve poured months of care into your garden, only for a single hard frost to turn your thriving plants into brittle husks overnight. That’s the reality for gardens in Zone 6a without the right winter protection—whether it’s mulch, frost blankets, or sturdy barriers.
But here’s the good news: With the right strategies—like insulating roots, shielding tender stems, and choosing the best materials—you can turn your garden into a frost-resistant fortress.
I’ll walk you through the most effective barriers, from budget-friendly mulch to high-performance row covers, so you can wake up to a garden that’s still standing strong in spring.
Ready to learn how to shield your plants without breaking the bank? Let’s dive into the game-changer techniques that’ll keep your garden alive all winter long.
Best frost-resistant barriers for protecting plants in winter
When first frost arrives, your garden's survival depends on the right winter protection barriers. Without proper shielding, even hardy perennials can suffer from freeze damage or soil heaving.
The key is choosing materials that balance insulation, breathability, and UV resistance—especially if you're protecting plants through late winter when sunlight returns. Let's compare the most effective options to safeguard your garden until spring.
Not all barriers work equally for every plant type. Tender annuals like tomatoes or basil need more aggressive protection than shrubs or woody perennials. Some materials trap too much moisture, leading to root rot, while others may block necessary light during short winter days.
The right choice depends on your USDA hardiness zone, plant types, and expected low temperatures. Below is a detailed comparison to help you decide which barrier best fits your garden's needs.
| Barrier Type |
Best For |
Temperature Range |
Breathability |
UV Resistance |
Pros |
Cons |
| Frost Blankets |
Tender perennials, annuals, young shrubs |
15°F to 25°F (-9°C to -4°C) |
High (woven fabric) |
Moderate (degrades in sunlight) |
Lightweight, reusable, easy to install |
Limited UV protection; may need staking |
| Row Covers (Floating) |
Vegetables, herbs, small shrubs |
20°F to 30°F (-7°C to -1°C) |
Very High (perforated) |
High (UV-stabilized) |
Allows sunlight; extends growing season |
Less insulation than blankets; requires support |
| Burlap Wraps |
Tree trunks, shrubs, perennials |
5°F to 20°F (-15°C to -7°C) |
Moderate (natural fiber) |
Low (degrades quickly) |
Cheap, biodegradable, wind-resistant |
Limited reuse; may harbor pests |
| Straw Mulch |
Perennials, bulbs, ground covers |
10°F to 25°F (-12°C to -4°C) |
High (organic matter) |
N/A (applied to soil) |
Improves soil, retains moisture, free |
Messy; may attract rodents |
| Pine Boughs |
Roses, tender perennials, small trees |
0°F to 15°F (-18°C to -9°C) |
Moderate (natural insulation) |
N/A (applied to plants) |
Natural, pest-repellent, biodegradable |
Short-term use
How to install winter protection barriers for maximum effectiveness
Properly installing winter protection barriers can mean the difference between a thriving spring garden and a sad, frostbitten landscape. Timing is everything—apply barriers before the first hard frost, typically in late fall (around October 15 in USDA Zone 6a).
The key is balancing insulation with ventilation to prevent moisture buildup and plant suffocation.
Choose the right barrier for your plants: frost blankets for tender annuals, burlap wraps for shrubs, or row covers for vegetable beds. Each requires slightly different installation techniques to maximize effectiveness while avoiding common pitfalls like improper anchoring or over-tightening.
Step-by-Step Guide to Installing Winter Protection Barriers
-
Step 1: Prepare the Area
Clear debris and gently prune dead foliage to reduce disease risk. Loosen soil slightly around perennial bases to improve airflow.
-
Step 2: Apply Mulch First
Spread 2-3 inches of straw or shredded leaves around plants to insulate roots. Avoid piling mulch against stems to prevent rot.
-
Step 3: Install the Barrier
Drape frost blankets or row covers loosely over plants, leaving 1-2 inches of space at the top for ventilation. Avoid tight fits to prevent moisture trapping.
-
Step 4: Secure Edges
Use bricks, U-pins, or landscape staples to anchor edges without piercing plant stems. For windy areas, add extra weight (like sandbags) to prevent flapping.
-
Step 5: Ventilate During Thaws
On mild winter days (above 40°F), lift covers briefly to reduce condensation. This prevents fungal growth and root suffocation.
-
Step 6: Remove Carefully in Spring
Wait until nighttime temps stay above 32°F before removing barriers. Gradually acclimate plants to outdoor conditions over 1-2 weeks to avoid shock.
One of the biggest mistakes gardeners make is over-tightening covers, which traps heat and moisture. Always leave ventilation gaps—even a few inches can prevent root rot and mold growth. For tender perennials, like lavender or rosemary, add an extra layer of burlap for wind protection.
Monitor your barriers throughout winter. If snow accumulates, gently brush it off to maintain insulation. In Zone 6a, expect 10-15°F dips, so double-check that your barriers provide at least 10°F of protection.
For container plants, move them to a sheltered spot and wrap pots in bubble wrap for extra insulation.
Remove winter barriers too early, and a sudden late frost can undo months of care. In Zone 6a, aim to remove covers by mid-April, but always check your local frost date for accuracy. With proper installation, your garden will emerge in spring stronger than ever! 🌱
★★★★★4.7(9 reviews)
|