Advice
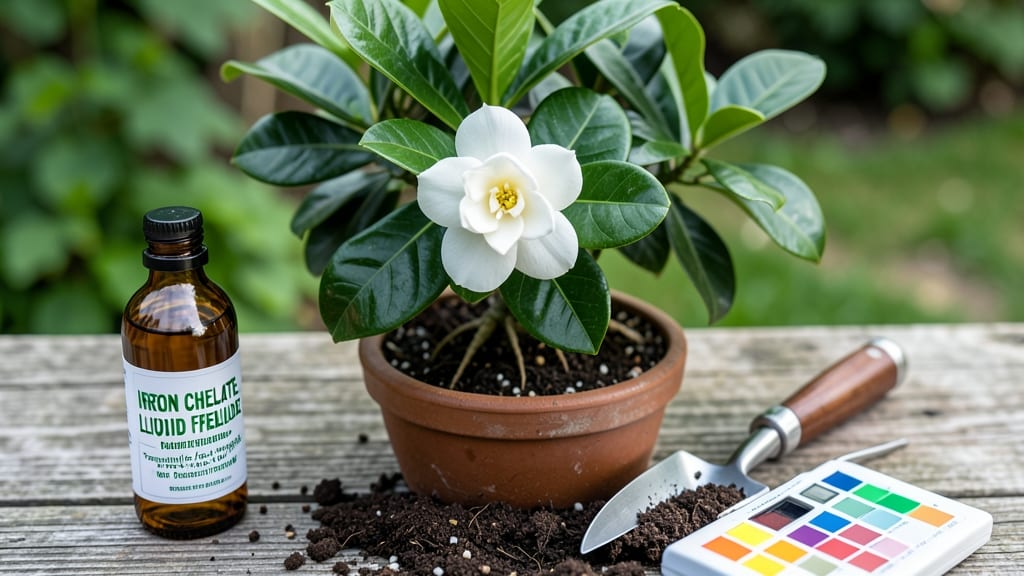
Giving your gardenias the iron they crave is the fastest way to banish those unsightly yellow leaves and restore their glossy, deep green 🌸—and you don’t need a green thumb to do it right.
Yellowing leaves on your gardenias? Iron deficiency (chlorosis) is likely the culprit—and fixing it doesn’t require a degree in horticulture. With the right iron application, you can restore vibrant foliage in weeks, not months.
Most gardeners overlook soil pH or overwatering as the real culprits behind iron starvation. Acidic soil (pH 5.0-6.0) unlocks iron for gardenias, but alkaline conditions lock it away—even if you’re using iron supplements.
In this guide, I’ll walk you through three simple steps to diagnose, treat, and prevent iron deficiency—so your gardenias bloom with confidence, not just leaves.
How to diagnose iron deficiency in gardenias (and why it happens)
If your gardenias are losing their lush green leaves and turning a pale yellow between the veins, you're likely dealing with iron deficiency—a common issue for these acid-loving plants. This condition, called chlorosis, occurs when gardenias can't absorb enough iron, even if the soil contains plenty of it.
The problem often stems from alkaline soil or poor root health, not a lack of iron itself.
Gardenias thrive in acidic soil (pH 5.0-6.0), but many gardeners accidentally create alkaline conditions by over-amending with lime or using tap water high in calcium. When soil pH rises above 6.5, iron becomes locked in the soil and unavailable to your plants.
Even overwatering or compacted soil can suffocate roots, preventing them from accessing nutrients.
Before reaching for iron supplements, confirm the diagnosis by checking for these chlorosis symptoms:
- Yellowing leaves that stay green only along the veins
- New growth appearing paler than mature leaves
- Stunted flowering or smaller-than-usual blooms
Iron deficiency often starts with young leaves turning yellow while older leaves remain green—a clear sign your gardenias can't access iron from the soil.
Unlike nutrient deficiencies that affect older leaves first, iron chlorosis targets new growth because iron is mobile in the plant and gets "shuttled" to where it's needed most.
Another red flag is poor flowering. Gardenias need iron to produce chlorophyll for energy, and without it, they divert resources away from blooms. You might notice buds forming but dropping off before opening, or flowers that are smaller and less fragrant than usual.
This is your gardenia's way of telling you it's struggling to thrive.
Don't confuse iron deficiency with overwatering, which can also cause yellow leaves. The key difference? Overwatered gardenias will have yellowing that starts at the leaf edges and often includes mushy stems or roots.
Iron deficiency, however, leaves the veins green and affects new growth first. Stick your finger 1-2 inches into the soil—if it's soggy, you're overwatering.
Soil pH is the #1 culprit behind iron deficiency in gardenias. These plants hate alkaline soil—when pH rises above 6.5, iron becomes insoluble and your gardenias can't absorb it, even if it's present.
Test your soil with a home pH kit (available at garden centers for under $10) or send a sample to your local cooperative extension service for accurate results.
If your soil tests above 6.0, you'll need to lower the pH before adding iron. Sprinkle elemental sulfur around the base of your gardenias (follow package rates) and water it in. It takes 2-4 weeks to adjust pH, so don't rush—you want gradual changes to avoid shocking the roots.
Pair this with organic matter like peat moss or compost to improve soil structure and iron availability.
Once you've ruled out pH issues, check for root-bound conditions. Gardenias in containers often suffer from iron deficiency because roots become compacted and can't access nutrients.
If your plant's roots are circling the pot or growing through drainage holes, it's time to repot into a larger container with fresh, acidic potting mix. Add a handful of perlite to improve drainage and prevent future issues.
Remember: Prevention is easier than cure. Regularly test your soil pH every 1-2 years, especially if you've amended it with lime or other alkaline materials.
Mulch with pine needles or oak leaves to naturally acidify the soil over time, and avoid overwatering—soggy roots can't absorb nutrients efficiently, even if the iron is available. With these steps, your gardenias will regain their glossy green leaves and abundant blooms in no time! 🌸
Best iron supplements for gardenias: chelated vs. non-chelated options compared
When your gardenias show yellowing between veins (chlorosis), they’re screaming for iron—but not all supplements work equally well. Gardenias thrive in acidic soil (pH 5.0-6.0), and their roots struggle to absorb iron from alkaline or compacted soil.
That’s why choosing the right supplement makes all the difference. Let’s break down your options: iron sulfate, iron chelate, and organic alternatives.
Iron sulfate is the most common and affordable choice, but it can burn roots if overused or applied incorrectly. It’s best for quick fixes in well-aerated soil, but gardenias often grow in heavier, clay-based soils where iron sulfate locks up and becomes unavailable.
On the other hand, iron chelate is pre-mixed with organic acids to ensure immediate uptake, making it ideal for gardenias. Organic options like iron-rich compost or fish emulsion are slower but safer for long-term health.
Why the debate over chelated vs. non-chelated? Chelated iron is more expensive but 100% plant-available, while iron sulfate can oxidize and bind in alkaline soils, wasting your time and money. For gardenias, which are sensitive to soil pH, chelated iron is often the smarter investment. However, if you’re on a budget, iron sulfate can work—if you acidify the soil first with sulfur or peat moss.
Iron Supplement Comparison for Gardenias
- ✅ Pros:
- Low cost
- Fast-acting in acidic soil
- ❌ Cons:
- Risk of root burn if overused
- Locks up in alkaline soil
- ✅ Pros:
- 100% plant-available
- Safe for gardenias in all soils
- Slow-release formula
- ❌ Cons:
- Higher cost than sulfate
- ✅ Pros:
- Improves soil health long-term
- No risk of toxicity
- Budget-friendly (compost, fish emulsion)
- ❌ Cons:
- Slower results (weeks, not days)
- Requires consistent use
🌿 Best for gardenias: Iron chelate for quick fixes, organic amendments for long-term health.
For foliar sprays, iron chelate is your best bet—it absorbs through leaves instantly, giving you visible results in 2-4 weeks. Mix 1 tsp per gallon of water and spray on early mornings to avoid leaf burn from evaporation.
If you’re using iron sulfate, always apply it to moist soil and never exceed 1 tbsp per plant in a single application.
Organic options like fish emulsion or iron-rich compost (like worm castings) are my go-to for gardenias in containers. They improve soil structure while slowly releasing iron, but you’ll need to reapply every 3-4 months during the growing season.
Pair organic iron with peat moss or pine needles to keep the soil acidic—gardenias hate alkaline conditions.
Pro tip: Always test your soil pH before applying iron. If your soil is above 6.5 pH, iron sulfate will fail, and you’ll waste money. Use a soil test kit (available at garden centers for $10-$15) to check before treating.
For gardenias, aim for pH 5.0-6.0—that’s their sweet spot for iron uptake.